If outdated applications are slowing down your business processes, in this article we will look at how to implement an app quickly and easily using Power Apps.
From optimizing workflows to improving collaboration, learn firsthand how Power Apps can revolutionize your organization. So buckle up and get ready for a plunge into the world of digital transformation!
We recommend that you read ourPower Apps Basicsarticle before continuing to become more familiar with the tool. However, if you prefer to go straight to the action, don’t worry, it will not be strictly necessary in order to follow the following tutorial.
Brief review on Power Apps
Power Apps is a suite of Microsoft services that enables rapid, low-code deployment of complex custom business apps connected to various online and local data sources (Dataverse, SharePoint, Excel,Office 365, Dynamics 365, SQL Server, and so on).
Like Power Automate, Power Apps is part of the Microsoft Power Platform, a set of platforms that enable the creation of customized software solutions, consisting mainly of the following components:

It is important to remember that a Power App is developed in and for a purely corporate context. On the other hand, in case there is a need to implement, for example, an e-commerce that is also visible to external users, it would be necessary to use Power Pages, a platform dedicated to the creation of external-facing websites.
The case: Innovation Projects
We recently had a Client who wanted to use PowerApps to keep track of internal innovation projects.
So we created a custom PowerApp that met all the requirements, and in this article we will look at a very simplified version of it, on dummy data, for educational purposes. Overall, the PowerApp we created was very successful in tracking projects-it was easy to use and provided all the information needed in one place.
The real case also saw many additional and advanced features, but in this Case Study we will build anapp that can allow users to create new projects, edit, delete them, and send emails.
How to implement an app in Power Apps from scratch: Empty App Canvas
There are many ways to implement an app in Power Apps, and today we will start with an empty Canvas app.
Canvas apps are a great way toquickly create mobile apps without having to write any code. They are easy to use and allow you to quickly create a native-looking app on any platform.
First, let’s go tohttps://powerapps.microsoft.com/it-it/and log in with your corporate Microsoft credentials. Please note: unless you obtain a free trial license, you will need to have an appropriate license to use and share the product, e.g., MS Office 365.
After logging in you will be sent to the Power Apps Home Page, where you can create a new App, go into editing/viewing one you have already created, share it, or delete it. Here you can also see all the apps we have created or that have been shared with us.
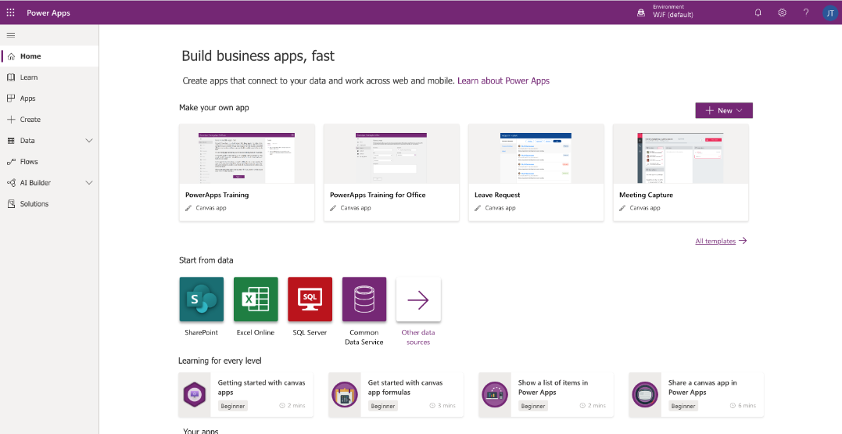
Create an empty App canvas
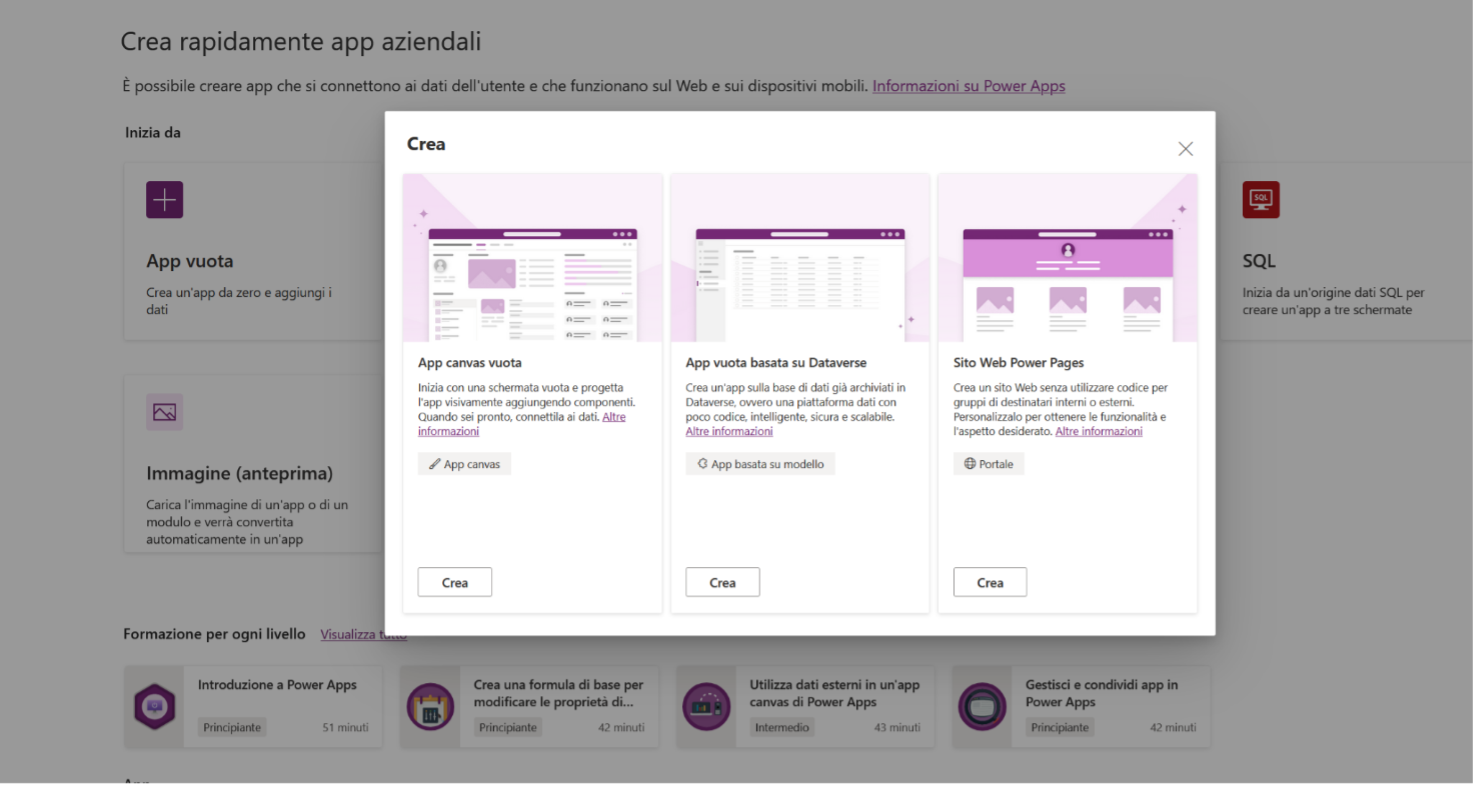
Clicking on Empty App > (Empty App canvas) Create> (Tablet) Create will start the process of creating a new App.
It is important to design the app for the primary device in which it will be used.
There aretwo form factorsto choose from: thePhone form factor and the Tablet form factor. The main difference is the screen size, which determines the amount of space available to compile the app.
After a few seconds we will be sent back to the work area that allows us to edit our application:Power Apps Studio.
In this window it is essential to remember to always save before exiting so that you do not lose the progress you have achieved on your work.

Before continuing, in case you have not already done so by reading the PowerApps Basics article, we recommend that you follow the following tutorial that allows you to become familiar with the tool in just a few minutes.
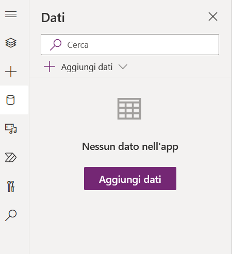
Adding the data
Once Power Apps Studio is open, let’s go to link the data-just click the relevant icon in the left vertical bar.
In this example, we are going to add a Sharepoint list with data from different innovation projects. We recommend reading the following article on how to link Sharepoint data if you are having difficulty linking your data.
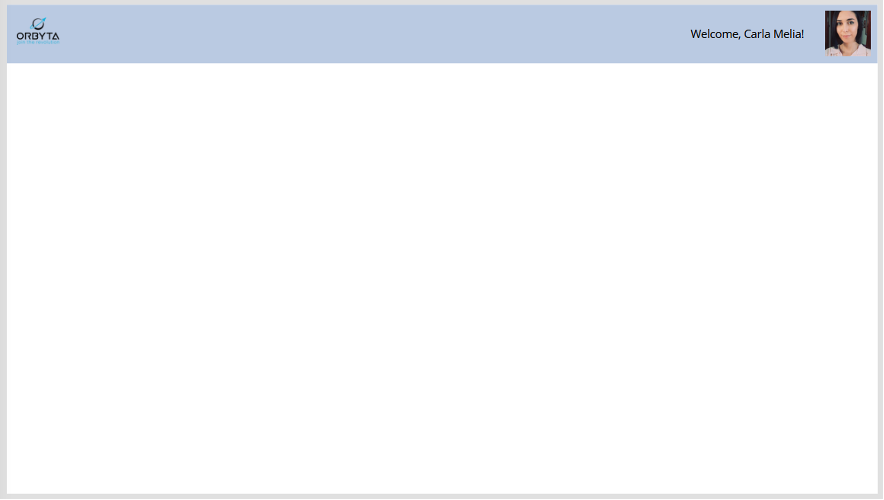
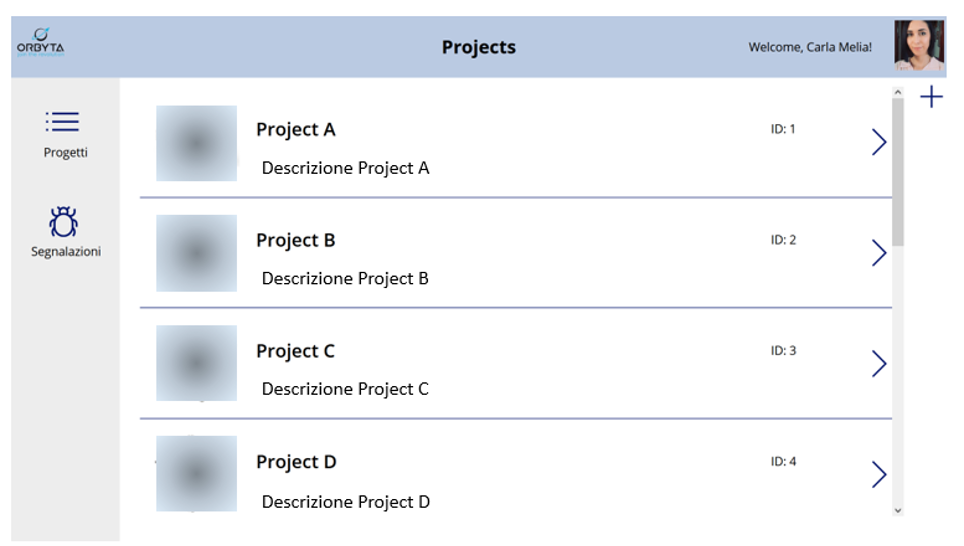
Once the data is included, we can start working on creating a header at the top and a side navigation menu.
Add header
We recommend adding, again using a text label, a title to the page.
We should get a result like the following:
Add a side navigation menu
Suppose we have 2 pages navigable from the menu, one with the list of projects, one with a fillable form to report something to the ICT support group, for example, a bug or a CR.
We rename the first page created with the name “Projects,” duplicate, and name the duplicate page as “Support Form”
Let’s go to the Project page and add an icon (look for it in the “Insert” menu) used before and place it on the left. Let’s write in its OnSelect Navigate(Project) property. Let’s do the same thing by creating a second icon to our liking but entering in its OnSelect Navigate(‘Support Form’) property. This way, when we click on the first icon we will be sent back to the first page and similarly, when we click on the second, to the second. Let’s copy-paste the created mini-menu on the Support Form page as well, so we can use it on both screens.
We can also add other text labels and shapes to make the menu more understandable and pleasant.
Create Project Gallery and Details screen
We then go on to create a searchable list of projects by entering a “VerticalCollection” and selecting our data source.
Such a Collection, or Gallery, will have elements (or controls) within it, each of them editable at will. You can also add other elements again using the Insert button while keeping the Gallery selected.
In this case we keep the projects name and images, replace the automatically put subtitle to ID with the project description (by changing its Text property from Item.ID to Item.Description). This is possible because in our Sharepoint list we have a description column called precisely “Description,” but we could put any other information of interest to us.
Finally, we add a navigation command to the arrow on the right, in its OnSelect property, to a detail screen.
To do this we create a third screen, Details, by writing in the OnSelect of the arrow “Set(RecordToUse; ThisItem);; Navigate(Details);;”
This command will not only navigate to the detail screen but also save in the RecordToUse variable the item selected from the collection.
It will then be possible to enrich the detail screen by putting images and text labels that in their properties (Image and Text respectively) using RecordToUse.
If we want to make information about a record in the Sharepoint list easily editable, it will be sufficient to enter an Edit Form and re-select the data source used, resulting in a preconfigured detail screen that provides for easy editing and deletion of the record from the database.
For example, by adding in the detail screen, next to the created form, also a save icon and a delete icon, simply by writing in their relative OnSelect properties the following formulas, we will have created an app with these capabilities.
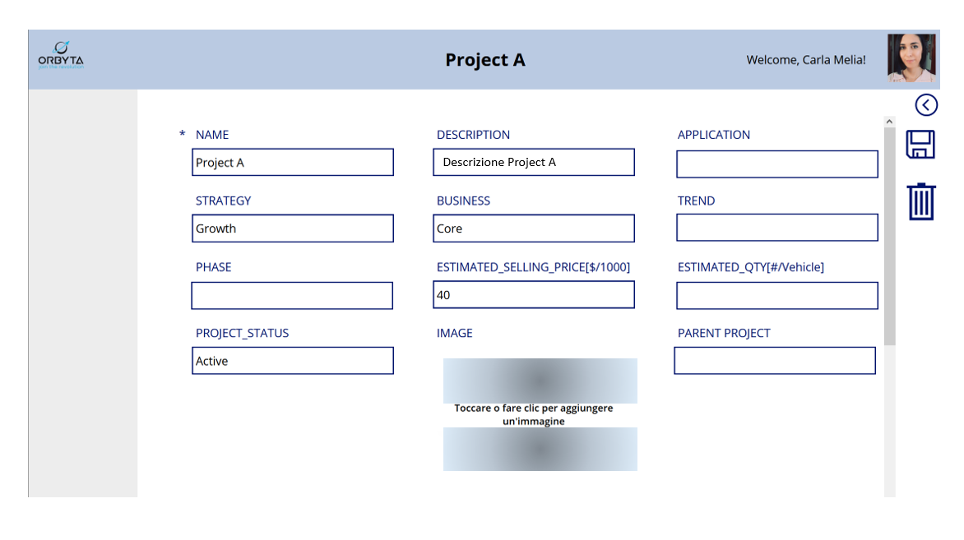
Always using an Edit Form-set, however, in its “Default Mode” property to “New”-it will be possible to create a form that allows, again using the SubmitForm function, to add new records within the data source.
We recommend that you follow the following tutorial to become more fully familiar with Power Apps forms.
Add a Support Form screen
Let us now see how to add a form to the Support page:
1. On the Support page add two text input boxes, which specifically will be used to store the subject and content of the email to be sent. Call the two objectsBoxObject and BoxBody, respectively.
2. Click the Power Automate icon on the left > click Add Flow > select the latest flow template. Specifically this is the one that allows you to click a button and send an email. Follow the instructions and in this way you will have implemented a small Power Automate flow that when called sends an email.
3. Add an icon by setting its OnSelect property to ‘ClickabuttoninPowerAppstosendanemail’.Run(“Email_to_send”;BoxObject.Text; BoxBody.Text). This will cause the button, whenever clicked, to initiate the execution of the ‘ClickabuttoninPowerAppstosendanemail’ stream created by sending anemail to the given address with subject and body taken directly from the two text input boxes.
Additional details can be added to the page, for example, supplementing the boxes with placeholders, adding text labels or buttons that reset the boxes: just put on their OnSelect property Reset(BoxObject) and Reset(BoxBody) respectively.
As we have seen, Microsoft Power Apps can then be used in combination with other technologies to simplify the creation of powerful apps for the organization, including Power Automate.
Power Apps in truth is already capable of performing numerous functions, such as sending an email, and in this example a Power Automate flow was used for educational purposes only. It remains clear, however, that the Power Platform tools together can greatly extend the potential of each of its components. Indeed, it would be advisable to use Power Automate only for more complex solutions, such as approval workflows, which are not available in Power Apps.
Condividi tramite